Monday, June 6, 2011
Wednesday, May 4, 2011
Young Dancers - Some Lightroom Post Production
During the shootout we realized that one of our lenses got "foggy".
In old film days, this would have been a session terminator. We decided to continue the session at the risk of re-doing it in another day. Definitely not a disaster...
This post is actually a free Lightroom tutorial for rescuing foggy photos.
The original foggy photo looked like this:
Lets start working in Lightroom
A quick glance at the histogram reveals most of the problem - no shadows:
The first step will be to add some shadows with the Blacks slider in the Basic tab:
Actual values might be different with other photos. After darkening the Blacks, you might need to increase Exposure.
What about some color?
To change the general "look" of the photo I chose Leica M8 out of PSKiss Cross Camera Color Profile pack for my camera. I found out that this color profile was best for this session.
I switched to the Camera Calibration tab and picked Leica M8 from the Profile menu:
Fine Tuning Colors in Lightroom
The color profile I chose, changed the pink color of her Dancer's leotard. In addition, I don't like the "plastic" appearance of the greens of this photo, so some fine tuning will be necessary. To do so, I switched to the HSL tab and fixed the Hue of the Reds:
The next step was to desaturate the Greens, the Reds ans the Oranges:
Actual values might be different with other photos
Final Tone Curve Adjustments in Lightroom
To give the image its final tonal range, switch to the Tone Curve tab and adjust the curve.
In this image (as in many others...), I used the "button" next to the curve area so I could click and drag on the areas I wanted to adjust and let the curve move by it self:
Local-contrast with Clarity
For the "final touch" I decided to increase local-contrast using the Clarity slider in the Basic tab:
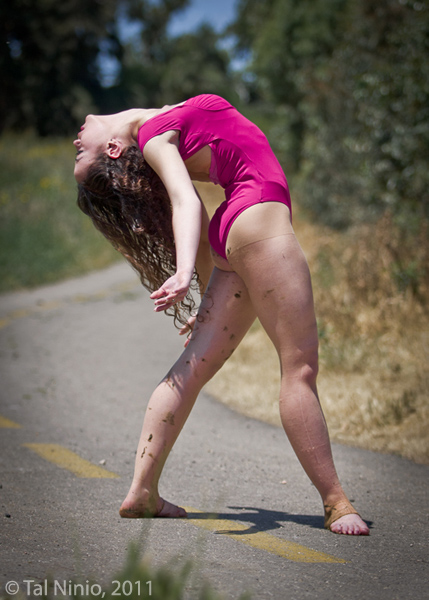
The Final Image
Tuesday, April 26, 2011
Young Dancers - On Going Photo Project
How did this start?
My daughter is a dancer. She also loves to photograph dancers.
Now combine this with her father's photography and image editing enthusiasm. Where does it go to?
Exactly. A joint project. A father and daughter reunion, if you like...
My beautiful daughter in action:
The Process
The work process in this photography project is fascinating for me. The girls choose the locations, the outfits and the staging. At this stage, I am just a consultant (and the driver...). We decided to use only natural light.
Then we start the shootout. Both of us are shooting, using different camera bodies, different lenses and shoot from different angles. This way we don't step on each other's toes... It is a very interesting experience because photography is actually an individual creative process, so how can it be done in couple? Well, with some patience and tolerance it can be done and we found out that it is very-very pleasing.
After we get back home, we check the photos, trash the wrong ones, sort them and post process them.
The First Location
As mentioned, the girls picked up the location - an open field right outside our hometown:
The Shootout
Here are some samples of the photographs. I will post more samples during the week:
All images shot as Raw, developed with Photoshop CS5
Monday, April 11, 2011
Self Portraits - One hell of a Challenge...
Self portraits are quite a challenge for any amateur or professional photographer.
I've been struggling with this issue for quite a while now and still, not sure what is the definition of a self portrait.
Is it a well planed studio photo with perfect lighting and perfect intention?
Should the photo have a well pronounced message?
Should it spontaneous?
Is it a snap shot taken somewhere?
Maybe it is a collection of photos from my close living environment?...?
Well, I guess it's a little bit of each and more...
In this never-ending-journey of seeking my "self portrait", after getting a mail from Artist Wanted I decided to combine some photos and create a small portfolio in their very interesting project The Power of SELF.
Some more samples of this on-going project can be found in my Self Portraits galley at pbase.
All photos are shot as Raw files and enhanced with PSKiss Productivity Filters and PSKiss Pixel Gear Suite.
Monday, March 28, 2011
Using Pixel Bender for Image Editing
Pixel Bender is a special plug-in for Adobe Photoshop CS5 (and CS4), that allows the program to use the graphic display card as an accelerator for certain actions. After you install Pixel Bender you get a new sub-menu in the Filter menu:
Choose Pixel Bender Gallery, and the Pixel Bender Gallery window will appear. This window contains some effects that personally I find quite useless so I simply threw them out of the Pixel Bender Files folder placed in the Adobe Photoshop CS5 folder...
A few months ago, PSKiss released the first ever image editing filters, based on Pixel Bender technology. These filters use full GPU acceleration and cover essential images processes:
- Skin Gear Pro is a portrait retouch filter that is able to smooth skin, but maintain skin texture. You can learn more about the face retouch options of this filter in this free video tutorial:
- S/H Tone Gear Pro is a contrast enhancement filter that allows you to control the contrast of your photo globally and to handle Highlights and Shadows contrast separately. In the filter's window, you can choose to preserve saturation or to boost it along with the contrast adjustments. You can learn more about the contrast enhancement options of this filter in this free video tutorial:
- Edge Gear is an edge sharpening filter that allows you to sharpen edges of your photo perfectly, without halos and other artifacts. It also has a special threshold slider to reduce noise in high ISO images. You can learn more about the edge sharpening options of this filter in this free video tutorial:
Each filters is operated by a unique workflow panel that allows quick access to the filter itself, 3 presets and some more time saving features.
You can get these Photoshop filters separately or you can purchase them in a special PSKiss Pixel Gear Pro bundle and get a 20% discount.
Subscribe to:
Posts (Atom)